Restoration Part 29
Interior, Glass and Lights
If you have been following my progress from day 1 you will know that I was restoring the Mini on a part time course at Bishop Burton College in East Yorkshire. Towards the end of the term the students on the course were notified that due to changes in funding methods the course fees for next year would go up from around the £250 mark to over £900. In addition we would not be allowed to keep our cars at the college between sessions. We found this to be both too expensive and a ludicrous idea as we had all planned our restorations based on having the cars at the college. How could you bring in a non mobile Mini each week never mind a LWB Landrover. Letters were written and protests made but to no avail we were financially encouraged not to attend this meant that none of the students actually completed their portfolios and attained the qualification.
My mini was therefore returned home at the end of June 2005.
The main jobs I have done since its return home are as follows.
Reconditioning the sunroof - the paint was stripped off and the bare aluminium polished. The winding/opening mechanism was stripped and cleaned before the sunroof was fitted to the car.
Fitting the headlining - the headlining stretchers were cleaned and fitted along with a new headlining prior to fitting the sunroof.
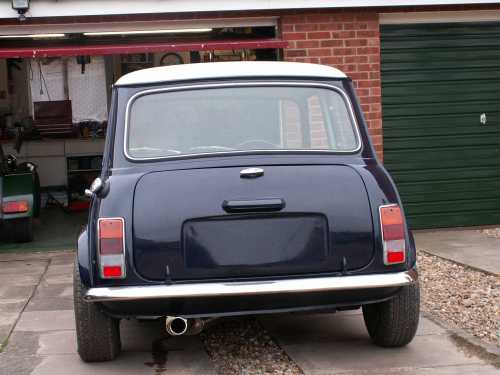
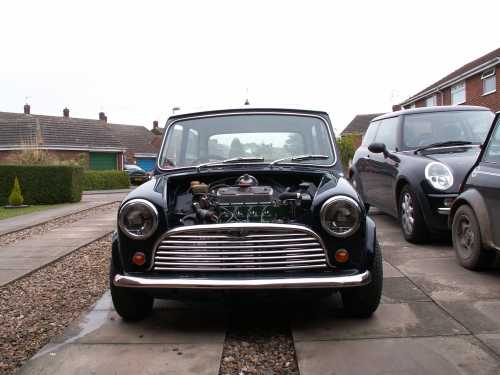
Fitting the windscreen and the rear window - new rubbers were used along with new chrome filler strip.
Fitting the rear windows - the opening rear windows stripped and cleaned as they had black window film stuck on them, new rubber seals were fitted.
Fitting the doors - new rubber glass channels were fitted prior to fitting the winding mechanism and the glass. To avoid rust the window weather strips were stuck in place using mastic rather than the clips that bite into the door top paint. One of the door hinges had to be repaired as the stud sheared.
Fitting the bumpers.
Fitting the boot.
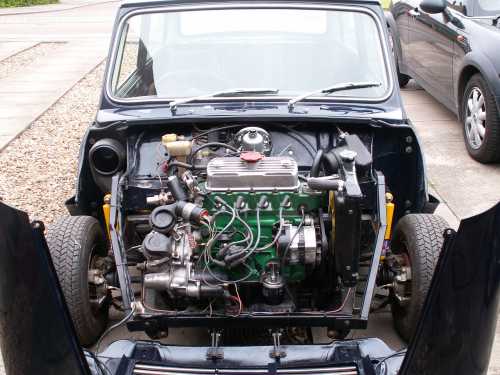
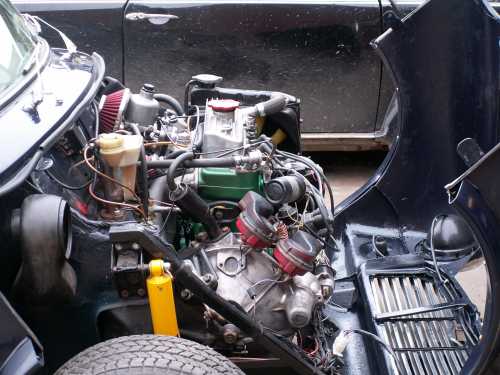
Fitting the heater choke and throttle cables. A new throttle cable had to be used as the one I had bought earlier must have been from an older type of Mini. I used one from a Metro as it had the clip that fitted on the carburettor.
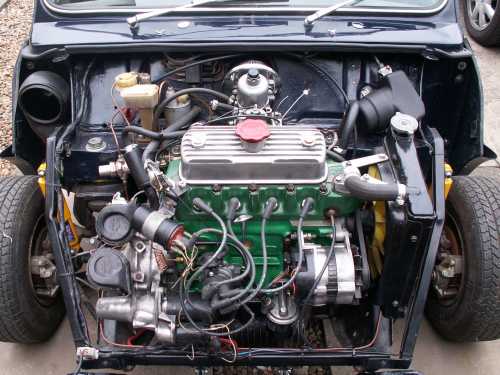
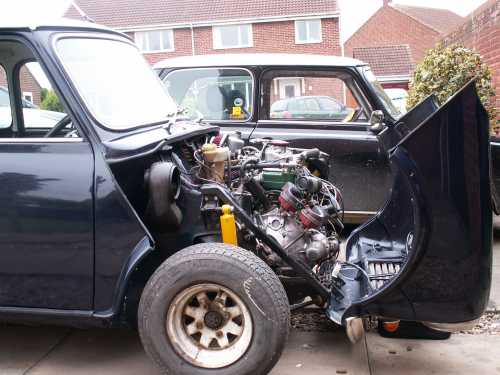
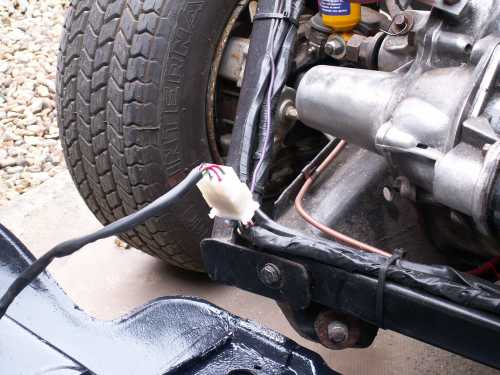
Fitting the lights - The front loom was cut and a multi-plug fitted to allow the removal of the flip front.
A Halogen headlamp kit was used.
The rear lights were reinstalled and one of the offside reversing light was modified to become the fog light the cabling was altered and wired back to the fog light switch. A red bulb was fitted and some red lense was used inside what was the rear light housing. The interior light and door switches were fitted.
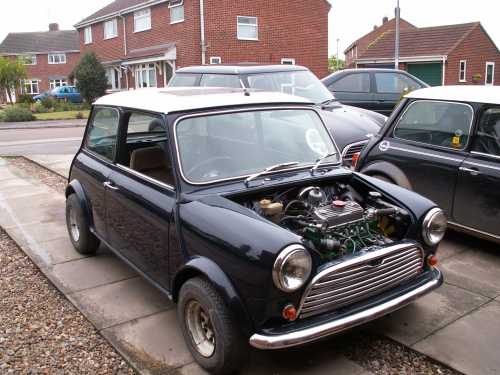
The quick release bonnet hinges must have been lost when the car was away for spraying I hadn't noticed when it was returned. Luckily the spring catches were still in place so I could modify a standard hinge to make it into a quick release hinge. The bonnet was then fitted and adjusted prior to fitting a new Mk1 grill and surround.
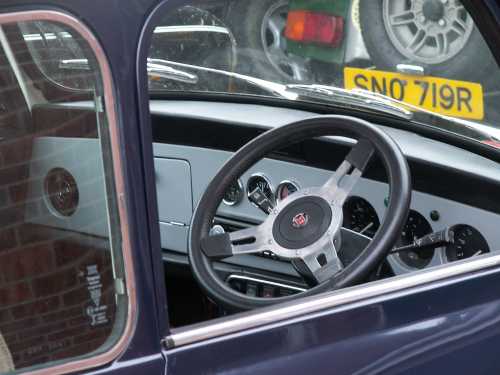
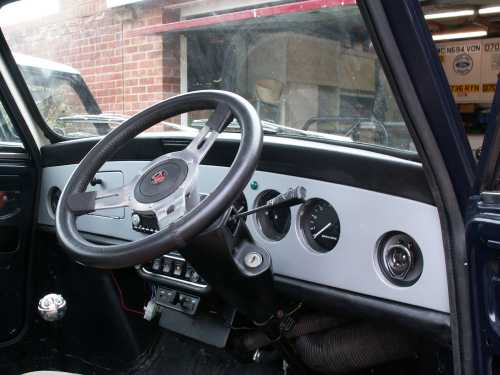
My thoughts then turned to the dashboard. I wanted a 3 clock dash I was lucky to find a suitable item at the local scrap yard along with a vacuum gauge and volt meter. The rims of the gauges were converted to chrome items using parts I had gathered over the years. They would now match the oil pressure gauge I already had stached away. I also wanted to fit a reasonable CD player that could play MP3 CDs I had one in my Escort so I took the opportunity to upgrade that to the next model which has a USB and SDRAM socket and use the old one in the Mini. The search then started for a dashboard in the end I used an old broken dash from another scrapyard as a template and cut one out of MDF. The old dash was cannibalized for the fitting blocks and brackets, glove box hinges, stay and knob. The finished dash was sprayed with primer and then numerous coats of silver paint. I used wheel paint on the assumption that it should be quite tough. The top and bottom rail padding were cleaned up and fitted prior to fitting the dash and all the instruments.
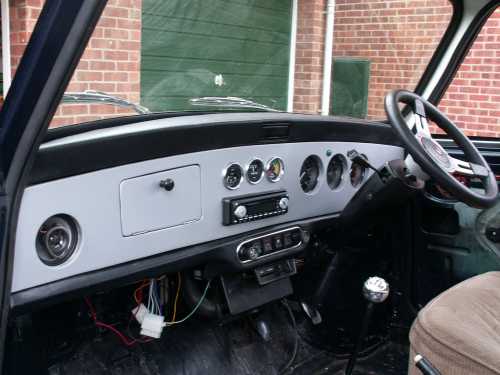
I had bought a steering wheel as part of a package of trim items but it didn't feel very good it was an Astrali item with a fake leather rim so when I was offered an old leather wheel for a fiver when having a tyre fitted on Gav's Mini I snapped it up. The wheel had black spokes and the paint was flaking but the leather rim was in good condition and it looked like the paint could be removed and the Aluminium cleaned and polished. It turned out quite well and is much better than the shiney new Astrali wheel.
My Mini Mayfair
Restoration
- 1 - Initial Inspection
- 2 - Boot Floor 1
- 3 - Boot Floor 2
- 4 - Boot Floor 3
- 5 - Rear Valance
- 6 - Body Stands & Engine Removal
- 7 - Front End Removal
- 8 - Bulkhead 1
- 9 - Bulkhead 2
- 10 - Sills 1
- 11 - Sills 2
- 12 - Sils 3
- 13 - Sills 4
- 14 - Footwell
- 15 - Floor
- 16 - Battery Box
- 17 - Underside
- 18 - Underside protection
- 19 - A Panels
- 20 - Wings & Front Panel
- 21 - Front Panels & Arches
- 22 - Rear Subframe
- 23 - Return From Paint
- 24 - Brakes
- 25 - Wiring
- 26 - Engine 1
- 27 - Engine 2
- 28 - Fitting Engine
- 29 - Interior, Glass, Lights
- 30 - Wheels & Tyres
- 31 - Finishing Touches