Restoration Part 7
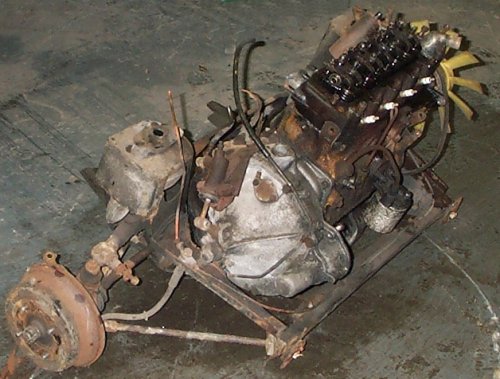
On Thursday I decided to remove the engine from the front subframe to allow it to be split into the engine and gearbox units. This would make it easier to lift in and out of the boot of my car so I could take it home for rebuilding. The task was quite easy with the subframe out of the car. The swivel hubs had to be removed to allow the driveshafts to be taken off. 3 of the 4 tapers came undone easily but one was loose and turned with the nut, the nut was spilt with a large chisel. With the driveshafts removed the engine /subframe unit was tipped over and the engine mounting were unbolted. The subframe was then lifted from the engine. I then started to split the engine from the gearbox. The remaining ancillaries, petrol pump, clutch master cylinder and fan were removed together with the clutch cover. I could not go any further as I would need a flywheel puller to split the flywheel from the crankshaft. I had one of these at home I would bring it in on Saturday.
When I arrived on Saturday I immediately realised that the flywheel puller I had owned since 1980 was no use on an engine fitted with a Verto clutch and flywheel assembly. The bolt thread had been altered and the pitch between the holes was different so I couldn't modify my puller. I would buy a new puller during the week.
As I could not go any further with my engine and gearbox I set about removing the front panels from the car. I am going to rebuild the car with a flip front so all the front bodywork would be removed including the inner wings.
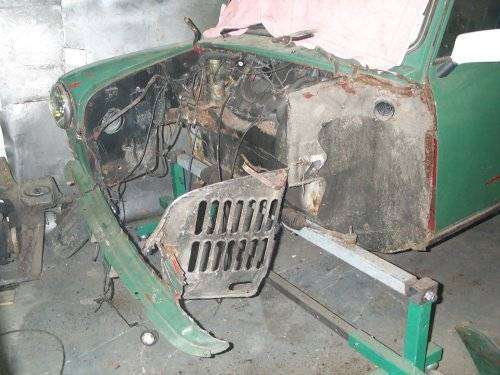
I started by removing the bonnet and hinges together with the catches from the front panel. I then removed the lights and indicators from the wings.
The passenger side wing was then cut off but I left the inner wing in place at this time as I would have to decide how much to remove when access was easier. The wiring loom was threaded though holes in the front panel so I carefully cut the areas concerned so I could remove the loom. The loom was pulled back into the passenger compartment through the hole in the bulkhead.
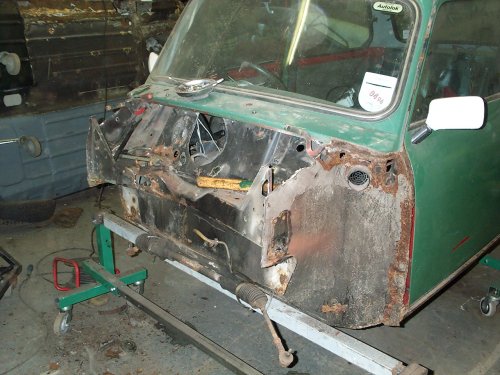
The front panel and the other wing were then cut off leaving the inner wings in place. I cut the inner wings back to the bulkhead and then removed the shock absorber mounts. The area under the mounts was quite rusty, it was holed on the drivers side they would need repair patches welded in I will reinforce this area with a piece of thicker sheet steel.
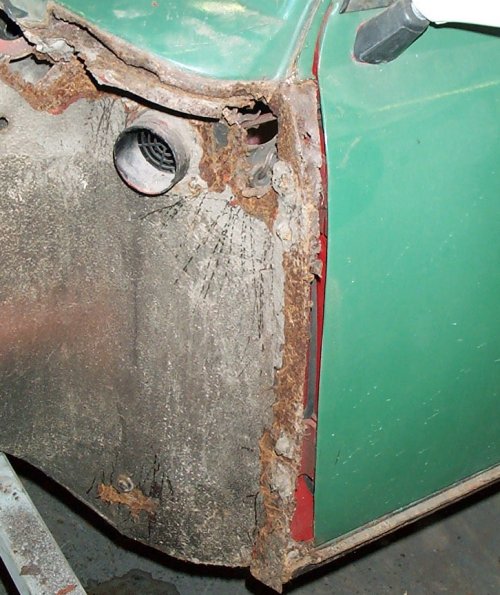
Both A panels were then removed exposing the front foot panel. There is considerable rust on the edges of these panels and around the air intake vent holes. These will require repair it looks like a panel will not be required as a repair piece should be able to be made from sheet steel.
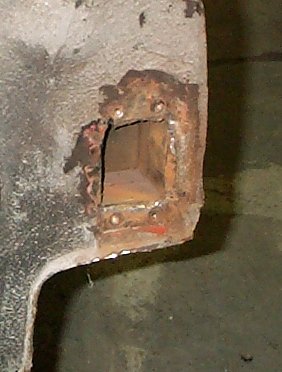
To allow the repair panels to be welded in place when the time comes the windscreen was removed together with the dashboard and instruments. To complete the removal of all items from the engine bay the clutch and brake master cylinders were removed. This was a real pig of a job as I could not remove the clevis pins holding the push rods to the pedals. After about an hour of contortions in the foot well I decided that even if I got the pins out I would only have to go though it all again on reassembly so to avoid all the trouble I cut an access hole in the bulkhead. I will weld some captive nuts on the inside of the access hole and bolt on a blanking plate.

The scuttle panel corners were stripped back to bare metal for inspection, they would need repairs the drivers side comer was worst it would need a comer repair panel. The passenger side was not as bad and is only in need of repairs to the lip edge.
The following Thursday armed with my new flywheel puller I removed the flywheel and clutch assembly. This allowed me to split the engine and gearbox. The gearbox and flywheel housing were then given a wash in the parts washer so they were ready to take home. I will remove the crankshaft next time and give the engine block a wash before taking the remaining parts home.
My Mini Mayfair
Restoration
- 1 - Initial Inspection
- 2 - Boot Floor 1
- 3 - Boot Floor 2
- 4 - Boot Floor 3
- 5 - Rear Valance
- 6 - Body Stands & Engine Removal
- 7 - Front End Removal
- 8 - Bulkhead 1
- 9 - Bulkhead 2
- 10 - Sills 1
- 11 - Sills 2
- 12 - Sils 3
- 13 - Sills 4
- 14 - Footwell
- 15 - Floor
- 16 - Battery Box
- 17 - Underside
- 18 - Underside protection
- 19 - A Panels
- 20 - Wings & Front Panel
- 21 - Front Panels & Arches
- 22 - Rear Subframe
- 23 - Return From Paint
- 24 - Brakes
- 25 - Wiring
- 26 - Engine 1
- 27 - Engine 2
- 28 - Fitting Engine
- 29 - Interior, Glass, Lights
- 30 - Wheels & Tyres
- 31 - Finishing Touches